Showing posts with label rambling. Show all posts

Saturday, November 7, 2015

Biscuits Are Love, Biscuits Are Life

I do believe my Southern roots show when I say that I love biscuits.

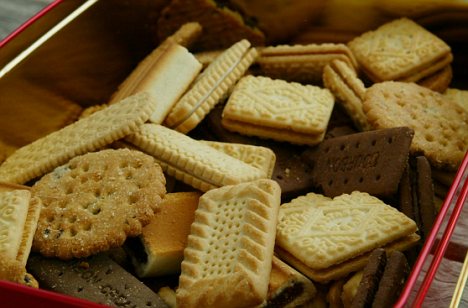
I'll take 1 of everything, please!
No, not that kind of biscuit! (Though they hold a special place in my heart, too). I'm talking about big, buttery, flaky biscuits.

Mmm. Mmm. Mmm.
The kind that you can't wait to break open while they're still hot so that you can watch the beautiful steam escape into the room around you, filling the space with a wonderfully homey scent.... Mmmm. (Is your mouth watering yet? If it's not, I think you may be sick. You might wanna see a doctor about that. Just sayin').

Hey, look! You saw a doctor. Herp derp. See what I did there?
Mid-fall is a perfect time to make a batch of these babies - the weather is getting colder, the leaves are almost done changing, leaving many trees already bare, and our bodies and minds are starting to gravitate toward heartier foods to keep us going. So, why not utilize that nip of cold in the air to kick start some home cooking during the fall and winter seasons? Let's get to it!

Getting ready to give you a chill.
(Side note: I used whole wheat white flour to make these this time around. I was craving a bit of a nuttier flavor. Feel free to use the usual all-purpose flour instead, if you want)!

Biscuit Recipe:
2 cups whole wheat white flour OR 2 cups all-purpose flour
1 tbsp sugar
3 tsp baking powder
1 tsp salt
2 tbsp butter, cold
2 tbsp shortening, cold
1 cup buttermilk, cold

Directions: 
1) Preheat your oven to 450 degrees. (It's gonna get hot in here, for sure).

You'll be fine, I promise.
2) Pour all of your dry ingredients into a mixing bowl and whisk together.

My not so action shot. Shhh. Don't tell anyone.
3) Cut in your butter and shortening. Try to do this as quickly as possible, you don't want the fats to melt too much. (That whole warm blooded thing is a nuisance sometimes).

It's gonna be so good!
4) Create a hole in the center of your mix and pour in your buttermilk. Combine all of your ingredients until they form a dough. Try not to work it too much! Also, the dough will be sticky!

It bubbled when I poured it in. It was funny. The end.
5) Place your dough on a lightly floured work surface. Fold the dough over on itself 5 to 6 times, again, trying not to work with it a lot. Shape your dough into a 1 inch thick oval (...ish) piece.

It's kind of an oval? Maybe? ... Use your imagination.
6) Cut out 2-inch round biscuits. Any leftover dough from the first run through can be reformed to make more biscuits. These next biscuits won't be quite as fluffy, but they'll taste just as good. (I was just shy of 12 biscuits! Ah well. Can't win 'em all)!

Flour your biscuit cutter to keep it from sticking to your dough!
7) Place your biscuits on an ungreased cookie sheet. Make sure the edges are just touching.

They look good enough to eat already!
8) Bake your biscuits until they're taller and golden on top, about 10 to 12 minutes. (OR if you have a demon oven like I do, they'll be done in just 7 minutes. I'm glad I was keeping an eye on those)!

Delicious perfection right there.
9) Enjoy!

I swear I didn't eat any right then and there. I SWEAR.
Now, since these biscuits are pretty easy to make, I thought I'd throw in a couple of things to put on top of them. A golden standard in the South, other than good ol' fashioned country gravy (which is delicious), is super simple - butter and honey. It's a party for your taste buds and you don't have to put too much effort into it. (I'm all about the simple life).

Um, yes, sign me up!
If you want to put a little extra effort into making a phenomenal biscuit dish, grab some apples ('tis the season, after all), and whip up some chunky, cooked apples!

Instructions: In a medium saucepan, combine 1/2 cup sugar, 1 cup cold water, and 1 tbsp flour until smooth. Bring that mixture to a boil. Keep cooking and stirring until it's thickened, about 2 minutes. Remove the pan from the heat and stir in 1/4 cup butter, 1/4 tsp cinnamon, and 1/8 tsp salt. Peel 4 large apples (I used a mixture of Fuji and McIntosh) and cut them into chunky pieces. Add the pieces to the mixture and return to the heat. Cook the apples over medium heat until they're soft. Spoon over your biscuits and enjoy!

Turn these ...
Into this!
Add then put it on top! Yum.
You can always use your leftover cooked apples for ice cream, pancakes, waffles ... you name it! (Or if you want to be a rebel, eat it as is! It's sort of (not at all) healthy. ... An apple a day keeps the doctor away? ...)

Except this one, apparently. Moving on!
For something more on the savory side, grab a skillet to make some breakfast sandwiches. There's nothing better than a super filling sammie to start off the day! Eggs, bacon or sausage, cheese ... it's a tried and true favorite, enhanced with the addition of a homemade biscuit.

But, no matter which way you get your biscuit on, you're bound to have a satisfying meal! All that love you put into creating them will shine through and that's something that you and your loved ones will really appreciate.

Even Tom Hiddlestone appreciates it.
What did YOU end up putting on your biscuits? Let me know in the comments below! Leave any other questions or comments below as well!

Y'all come back now, y'hear?! (Sorry not sorry).

And, as always, bake on with your bad selves!

Love,
Jackie

Sunday, October 25, 2015

This is Halloween

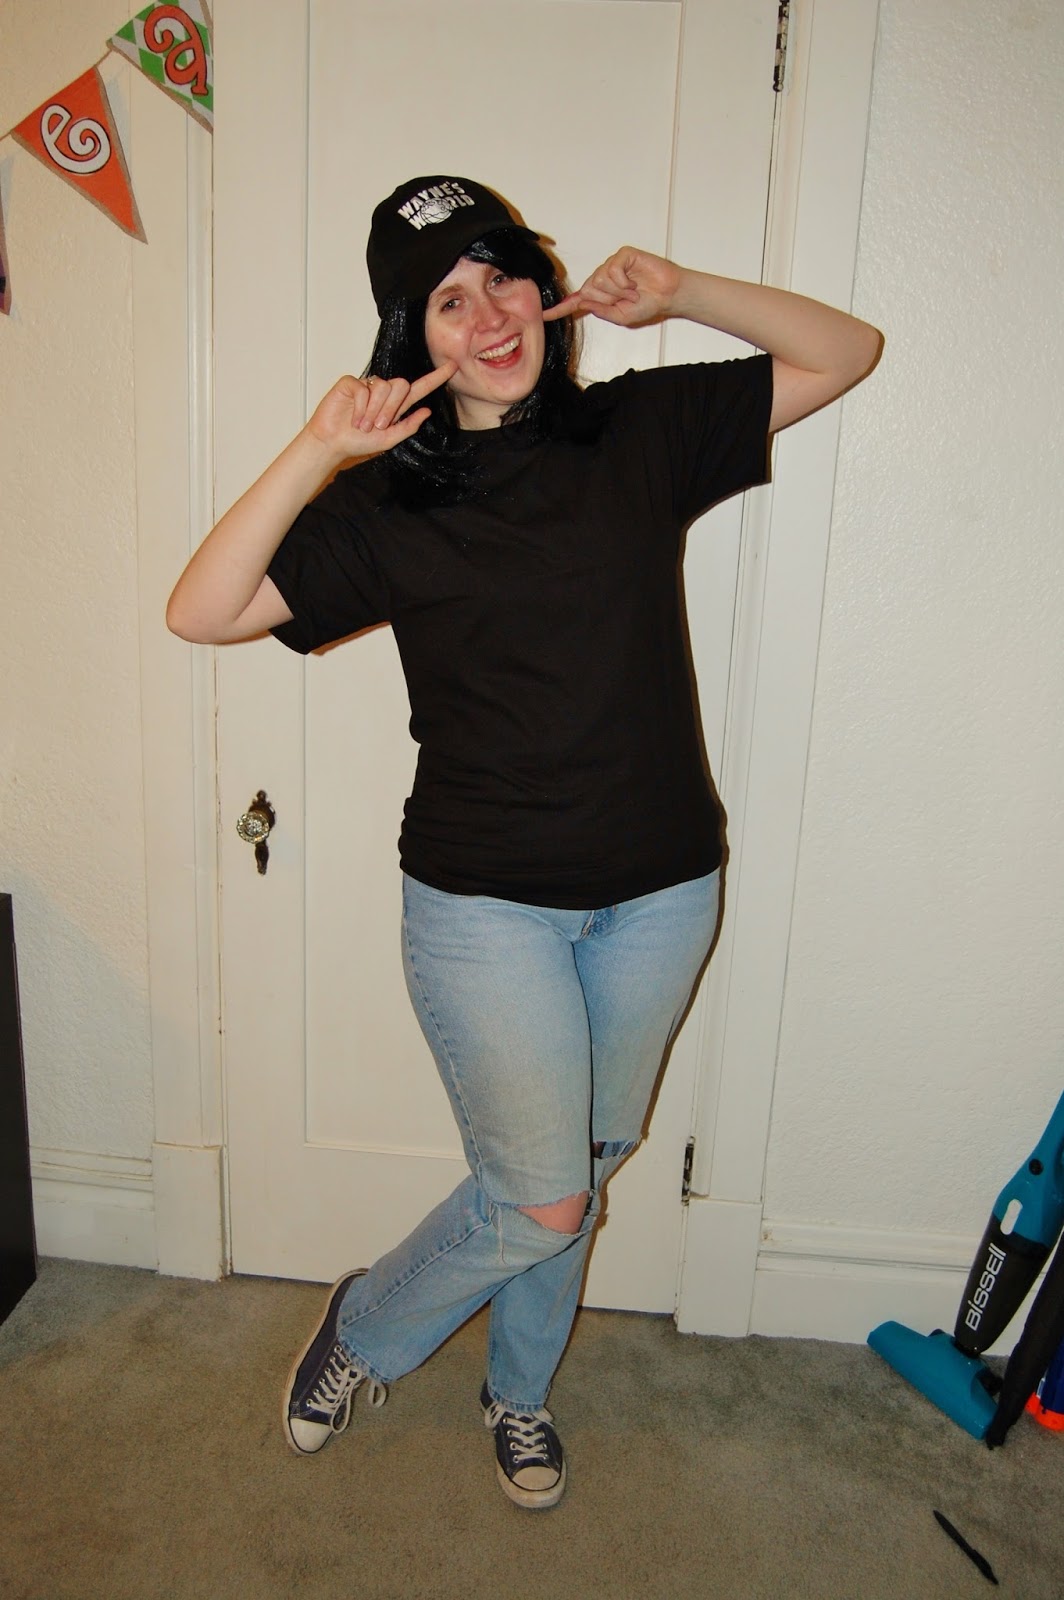
Party on, Garth!

Garth-ception
Party on, Wayne!

Most comfortable costume ever.
And party on, we did!

Aggressive headbanging is always acceptable.
In honor of Halloween, my favorite holiday by far, my sister and I donned our costumes* and made some delicious cake balls … er, cake eyeballs.

(*Little backstory for the costumes: My sister, Quinn, and I love Wayne’s World so much! It’s a great movie to put on anytime. And it's hard not to quote along. So, since we’re such big fans, we got sister tattoos for Quinn's 18th birthday based around some very famous lines.

This one's mine.
This one's Quinn's.
(Complete with Dean Winchester smoldering in the background).
We’re not dweebs, I swear.*)

Not only are these cake balls pleasing to the eye (herp-a-derp), they’re delicious and pretty simple to put together! Because you never know when you need to make your friends and family some treats the day before (or even the day of!) a party or get together.

Don't panic like Wayne. You've got this!
There are a couple ways to go about making these eyes:

1) You can be master of your kitchen and make the cake and frosting from scratch.
2) You can make things super simple and buy a pre-made cake and just mash it up.
3) OR you can meet somewhere in the middle, like I did, and make a box cake and use canned frosting.

I mean, you want to save your time and energy to make these eyeballs look disgustingly glorious, right? Right.

So, this is what you’ll need for this project!

- 1 9x13 cake (Flavor of your choice! We went with just a white cake).
- 1 can of frosting (We opted for vanilla to keep the color inside consistent).
 Candy melts (Varying colors).
- Gel food coloring (For whatever color candy melt you can’t find)!
 Chocolate chips (Use these for the pupils! You’re bound to have some in your kitchen cupboards somewhere if you bake as much as I do).
 Microwave safe bowl(s)
- Parchment paper
- Toothpicks
- Spoons
- And your imagination! Your eyeballs can be from humans, vampires, swamp monsters ... you name it! Let your mind run wild and come up with something eye-inspiring!

(Optional items: Piping bag and piping tips. Depends on how detailed you want to get)!

Alright! Once you’ve baked your cake according to the directions on the box, you’ll want to let it cool for awhile. You can let it cool overnight or stick it in the fridge or freezer to expedite the process.

Mine hung out in a bag for a few days.
Once your cake is sufficiently cooled, crumble it up into a large bowl. There will be crumbs everywhere!

Try not to lick your fingers, though.
After that, add your can of frosting to the crumbs and mix it up! I ended up using my hands for this part. No use in getting a spoon dirty when my hands work just as well, if not better, at getting all of the cake coated in frosting! Plus, it’s just really fun. But, watch out, this part is super messy.

Who wants a handshake?
Once you’ve gotten everything worked together, you’ll want to cover your mixture and stick it in the fridge for at least half an hour to let the frosting get firm again.

Then it’s time to form all of your eyeballs! Make them as big or as small as you want. Ours were about 1.5(ish) tablespoons worth of cake mix per eye. Roll ‘em up and place them on a plate. Keep going until you run out! (Or save a little to munch on. I won’t judge).

This is when you say, "Oooh, aaah"
When you’ve rolled together as many eyeballs as you care to make, get those little guys in the freezer. They’ll want to chill out for at least an hour before you try dipping them in melted candy coating.

These weren't even all of them!
Speaking of! That’s the next step. When it’s time to start decorating, figure out which color candy melts you want to use and start melting them! Just use the instructions that come on the packet.

Garth approved.
If you want to make human eyeballs, like we did, you’ll need white and blue (or green or brown) candy melts. We melted white candy melts to initially cover our cake balls. Once all of them are covered, stick them in the freezer to hurry up the hardening process.

I apparently like using my hands a lot.
Then we melted some blue candy melts to create the iris of the eye. I went all fancy and used a piping bag and tip to create that design. You can always go the easy route (like my sister did later) and use your mixing spoon to drizzle out the design. It works just as well! And eliminates extra cleanup. Before the iris hardens, stick a chocolate chip into it to make a pupil! Your eye can look straight at you or in some other crazy direction. It’s up to you and your creativity.

All eyes are on you at this point.
To make our eyes even creepier, I melted some more white candy coating, added red gel food coloring, and then used a toothpick to create some lovely bloodshot eyes.

They've probably been staring at the kitchen light for too long.
These poor souls clearly need some red eye relief. And they’ll find it...

In my mouth.

I’ll put them out of their misery. I’m just a kind-hearted person like that.

Quit it, guys. You're making me blush. I'm not that amazing.
And there you have it! Scrumptious, ghoulish delights, sure to be a crowd pleaser!

Never thought an eyeball would make me hungry.
(Psst, if you really want to kick up the ick factor with these eyeballs, pipe some red jelly [strawberry, raspberry, etc] into the center of your cake balls before you coat them in candy melts. When someone takes a bite out of one, they’ll get a yummy, yet slightly disgusting surprise)!

How great is that?! I love it. haha
With these steps, the eyeball decoration possibilities are endless! 

Just like this gif.
You could make septic eyes like Quinn made in honor of one of our favorite Youtubers, Jacksepticeye!


Or you could make yellow werewolf eyes that are sure to make some people think twice before taking a bite.

And the flavor combinations are endless too! Why not make eyes with chocolate cake, caramel frosting, and some marshmallow fluff in the middle? Or red velvet cake with cream cheese frosting? Or strawberry cake with champagne frosting?

Or or or … I’ll leave it there. I’m making myself drool.


These instructions are here for you to really have some fun! So have at it, my bewitching readers! If you make any eyeballs, or simply have any questions or comments, please leave them in the comment section below! And be sure to share this post with your family and friends if you like what you see! 

I hope you all have a safe and spooktacular Halloween. Don’t be afraid to embrace your weird side and have some fun on this mischievous holiday.

And, as always, bake on with your bad selves!

Or foxy selves, as it were.
Love,

JackieLantern  

Tuesday, May 12, 2015

Cheesecake for Mum!

My mom and I are super close. She's really one of my best friends, so I thought I'd dedicate a blog post to her! I meant to get this up before Mother's Day, but life happened, as it were. The family ended up taking a weekend trip down to see Walk the Moon in Las Vegas! We probably spent more time on the road than actually in Vegas, but it was still fun! We bonded over NPR. It was great.

Kevin's pants are glorious. I want a pair of my own.

Anyway! Since my family and I were on the road on Sunday, we decided to celebrate Mother's Day a few days early. Mom's dessert request was cheesecake! And I'm so happy it was. It's one of my favorite things to bake (even when it doesn't turn out quite right ... like this time ... more on that later) and it's just so delicious! You can make so many different flavor combinations. And you can add so many yummy toppings. And just. Mmm. So. Good.

Thanks, James Franco.
(I really do love cheesecake. Anytime there's a Cheesecake Factory close by during my travels, I have to go. Specifically for the cheesecake. And the bread. But, more importantly, the cheesecake. I'm drooling just thinking about it. I think I may have a problem).

Instead of making the usual spring form pan cheesecake (because, ya know, all that cutting is so messy), I opted for individual 8oz (adorable) mason jar cheesecakes. I've made them once in the past ... I'm not quite sure how many years ago it was, but they turned out really well the first time, so I figured I'd give them another go!

(Ohoho, I was so naive before I baked these...)

Baking selfies are must now. Also, tattoo!!
Now, as much as I love cheesecake, I don't have a usual go-to recipe for it.

(I know, I know. I'm working on getting organized with things like that).

I usually search the internet for a recipe to try out, but the current issue of Food Network Magazine (aka my bible) just so happened to have a basic cheesecake recipe! (Pretty sure that's why mom chose cheesecake, to be honest. Like mother, like daughter, am I right)? So, with magazine and mason jars in hand, I got to work.

Cheesecake Recipe (please don't sue me, Food Network)!
Ingredients:

Crust - 14 whole graham crackers
             2 tbsp sugar
             5 tbsp unsalted butter, melted

Cheesecake - 3 (8oz) packages cream cheese, room temperature
                       1 cup sugar
                       3 large eggs
                       2 tbsp fresh lemon juice
                       1 1/2 tsp vanilla extract

My true colors are shining through again because I didn't really plan out the process for this, nor did I really consult any mason jar cheesecake recipes this time around. I decided to wing it and see what happened.

Was that the best way to do it? Ha. Probably not. But I'm a rebel. And I do what I want.

Every moment has a perfect Loki gif.
I'll try to explain my process. We'll see how this goes.

(If I can explain how to make Captain America shield cookies, this should be a piece of cake. CHEESEcake. Ahem).

First things first: Preheat your oven to 300 degrees. Make sure you have some mason jars! Other ramekins would probably work, but mason jars are clear and allow you to see the layers of yummy food. And really, that's what you want. Because of reasons.

Am I making myself clear? No? Okay. Good.

Make sure you wash them before you use them. Mine were brand new and right out of the package, but I washed them anyway to make sure they were squeaky clean. Now onto the actual food!

You're going to start off making the graham cracker crust. Using either a food processor or the old tried and true "Ziplock bag and rolling pin" method, crush your graham crackers into crumbs. Or you could buy the already packaged graham cracker crumbs they sell at the grocery store. Whatever floats your boat!

Graham crackers awaiting their crumby death.
I used my roommate's "bullet" food processor to grind my crackers into smithereens. It only held about 4 crackers at a time, so I had to do this in stages. Grind and pour. Grind and pour. Grind and pour. It's okay if not all of your ground up cracker crumbs are the same size. Because I said so. And I've always liked getting a bigger chunk of cracker in my crust every now and then. Gives it a little extra crunch. Maybe I'm weird. I dunno.

Mmm. Sugar.
Once all of your crackers pulverized, add some sugar and melted butter and then mix it up! Try not to tuck in and eat all your crust, though. I know it's hard to resist that temptation, it smells so enticing, but it'll be for the best.

(I won't tell if you eat a little spoonful of it, though. We'll let it slide this time).

OMNOMNOM.
Line your mason jars up and start filling them with your crust mixture. With 12 mason jars, I used roughly 2 tablespoons of mix in each. Depending on the size and quantity you're using, though, you'll have to adjust accordingly. Once all of your mixture is divided, you'll need to pack it down. Being the resourceful person that I am, I opted for the handle of our ice cream scoop to get the job done. It worked really well, but anything that's flat (and fits inside your jar) should work!

HULK SMASH.
Most cheesecake recipes have you brown your crust before filling it with the cream cheese mixture, but I opted not to this time. Why? I dunno. I just wasn't feeling it.

How purty.
Grab your stand mixer and put cream cheese and sugar into the bowl. Mix until smooth and creamy.

I'm so artistic cheesy.
(That's a common theme in baking. We bakers are smooth operators. ;-D)

Next, add your eggs one at a time, combining in between each.

Free range and delicious.
Side note: I'm highlighting this beautiful egg because it's from my mom's very own brood of turkens. They're so much better than store bought. Thanks, mama! (Turkens are a real thing. Look 'em up)!

They invaded my sister's graduation photo shoot.
It'll start to turn such a lovely shade of pastel yellow.

I'd paint my walls this color if I had the chance.
Next, add your fresh lemon juice and vanilla and combine again. It smells so good! And you'll be really tempted to eat the batter. Or maybe that's just me. I'm all about the taste testing. Use a spatula to scrape the sides of your bowl during the mixing process. You don't want any of that cream cheese to stick to the inside of it and miss out on being cheesecake.

Then you'll need to divide your cream cheese mixture into your mason jars. I got roughly 2 1/2 tablespoons in each jar. Don't let any of it go to waste, though! Keep dividing 'til you run out!

Once all of your mason jars are filled, tap each of them gently on your counter. This'll help eliminate any air bubbles that are stuck in the mixture. And it'll even everything out. I love looking at the layers. Who knew layers could look scrumptious?  

I'm pretty sure they're saying, "Eat me."
Place your mason jars in a roasting pan, fill the pan with a short layer of water, and stick them in the oven. Bake them for 30 minutes. Turn off the oven and open the oven door a little and let them sit in there for another 30 minutes.

You'll want the cheesecakes to be just set - they'll still have a slight jiggle to them. Then remove them from the oven and keep them on the counter to cool a little bit longer.

To get them to set completely, put them in the fridge for a few hours or even overnight.

Or eat one right away. Because you worked hard. You deserve to have one.

Thanks, Donna.
Now, typically, a water bath within your oven will help keep your cheesecake from cracking. However, the baking gods didn't appreciate this gesture. My poor little cheesecakes cracked like no other.

I guess I didn't sacrifice enough chocolate sheep for this baking adventure to work completely in my favor.

Ah well. You win some, you lose some.

I edited this for dramatic effect.
(I like how nonchalant I sound about it now. I was really grumpy about it when it happened. It was slightly amusing).

I was super grumpy. Can you tell?
And there you have it! Cute little mason jar cheesecakes. You could top them with fresh strawberries or chocolate sauce or mixed berry jam or sprinkles or caramel or whipped cream or ... well, I think you get the picture. Mom wanted a blueberry sauce for hers, so I made one from scratch.

(With the help of Food Network Magazine again).
Blueberry Sauce
Ingredients - 3 1/2 cups fresh or frozen blueberries
                      1 cup water
                      1/2 cup maple syrup
                      1/4 cup sugar
                      1 tsp vanilla
                      Juice of 1 lemon

It was super simple to make. Just put all of the ingredients in a pot, bring it to a boil, and then let it simmer until it thickens. I left the blueberry chunks in the sauce. It gave the finished product a nice mix of textures - it wasn't completely creamy for every single bite.

Cracks? What cracks?
Mom really loved her cheesecake! And really, it was the least that I could do for her. She's the most loving and caring person I know. She gives and gives and gives before she even thinks about doing anything for herself. I love her more than I can put down in words and I appreciate her so, so much! I don't know who I'd be or what I'd do without her. I love you, mama!

All the love are belong to Mom.
Make sure you make this cheesecake for someone you love! Mom. Dad. Brother. Sister. Grandma. Grandpa. Best friend. Really, anybody who's important to you. They'll really appreciate it. =)

Thanks so much for reading! Leave any comments/questions/suggestions down below! If you give this recipe a go, let me know if you were successful in making them crack-free!

(Ha! That sounds horrible),

And as always, bake on with your bad selves!

- Jackie