Showing posts with label yummy. Show all posts

Wednesday, February 10, 2016

It's February already?!

Valentine's Day has never been a huge holiday for me. True, I always try to give my family and friends cards and sweets to help spread the love, but it's not a super important day. (It's no Christmas or Halloween, that's for sure)! Part of this might be due to the lack of Valentine's over the years. And part of it might be due to my lack of substantial love for the color pink. Or both! Who knows?! But, no matter! I decided to make a post for Valentine's Day this year anyway.

To celebrate loving life and all that it has to offer.

Enjoy life like Liz Lemon.
[Source: www.pinterest.com]
To celebrate who you are and who you have yet to become.

Embrace your quirks!
[Source: www.nkayesel.com]

To celebrate just having fun!

Release your inner Andy!
[Source: www.landmarkfestival.org]

So, whether you have a Valentine (hey, Arlen, heyyyyy), a house full of pets, your family and friends, or just yourself, celebrate the love this Valentine's Day and treat yourself to a delicious mug cake!

That's right, you don't even have to get a pot or pan dirty for this recipe. Just an ol' over-sized mug! (Which, to be honest, is the best kind of mug out there. Or I'm just addicted to drinking copious amounts of tea. Hmm).

Onto the food love!

Mug Cake Ingredients:
4 tbsp flour
3 tbsp sugar
2 tbsp cocoa powder
1 egg, whisked
3 tbsp milk
3 tbsp oil
A splash of vanilla
Jelly/jam/preserves of your choice
Sprinkles (because why not?!)

Directions:
1) Add the flour, sugar, cocoa, and sprinkles (if you wish) to your over-sized mug and mix together.

The delicious version of dirt.

2) Add the egg, milk, oil, and vanilla and combine. Be sure to scrape the bottoms of the mug to make sure all of the dry ingredients are incorporated.

Secret time! I forgot to take a picture when I added the other wet ingredients.

3) Add a dollop (I used about a tablespoon) of your choice of jelly/jam/preserves to your mix. I think it adds a nice tang to the finished product.

It really doesn't look very appetizing, but I promise it's yummy.

4) Place your mug in a microwave and heat on high for 2 to 3 minutes. It just depends on how powerful your microwave is. I accidentally cooked mine for a little too long, so keep an eye on it.

Nothing fancy here.

5) Let it rest for a bit before diving in! It'll be a little too warm for your taste buds straight out of the microwave.

This would be even better with ice cream or whipped cream on top.
Mmmmmmmmmm!

And there ya go! A quick and simple recipe to make for yourself! I like this recipe because it doesn't have an overpowering chocolate flavor. It has just the right amount to please a chocolate lover's palette.

What's your favorite Valentine's Day treat? Let me know in the comments below! If you have any other questions or comments, leave those down below too.

And, as always, bake on with your bad selves!

Happy Valentine's Day!!

Cheers!
[Source: www.justaboutwrite.com]
Love,
Jackie

Sunday, January 17, 2016

Leftover Cookies

I have a confession to make - I had no idea what I really wanted to bake for this blog post. I knew that I wanted to bake cookies, but that was about as far as my inspiration took me. Did I wanna make big cookies? Small cookies? Stuffed cookies? Super complex, decorated cookies? I didn't know! All I had in my head was ...

Cookies.
Spongebob gets me.
[Source: spoonuniversity.com]

I mean, let's face it, cookies are pretty much amazing. They're one of my favorite sweets to bake ... eat ... share ... You name the reason and I'll usually say yes to cookies.

OMNOMNOM
[Source: giphy.com]

Now, when I finally set off on my baking adventure, I went in with the intention of making Malteser cookies. The finished product wasn't what I had expected (I'll attempt those again one day), but it was too delicious not to share with you. I've ended up calling these "Leftover Cookies" because the basic recipe would be great with any leftover candy that you have lying around. Even my Maltesers were leftovers from a date I went on recently!

(I requested them with the full intention of eating them [they're one of my favorite candies], but I ended up being too nervous to actually consume any. Thanks to that special guy for getting them for me and for not minding that I didn't eat them right away. You're the best).

A wink from me through Scott Pilgrim.
[Source: giphy.com]

And while these cookies are far from healthy (all that butter and sugar), they'd be great with some healthy, leftover ingredients too! Nuts, dried fruit, seeds, oats, you name it. Whatever sounds good to you probably sounds good to me! Let your pantry lead the way. (And be sure to keep this recipe on hand near Valentine's Day ... Easter ... Halloween. Think of all that cheap, leftover candy you can buy at the supermarket)!

Ingredients
1 cup butter, softened
1 cup white sugar
1 cup light brown sugar, packed
2 large eggs
2 tsp vanilla
3 cups flour
1 tsp baking power
1 tsp baking soda
3/4 tsp salt
Leftover candy/ingredient of your choice!

Directions
1) Preheat oven to 350 degrees.

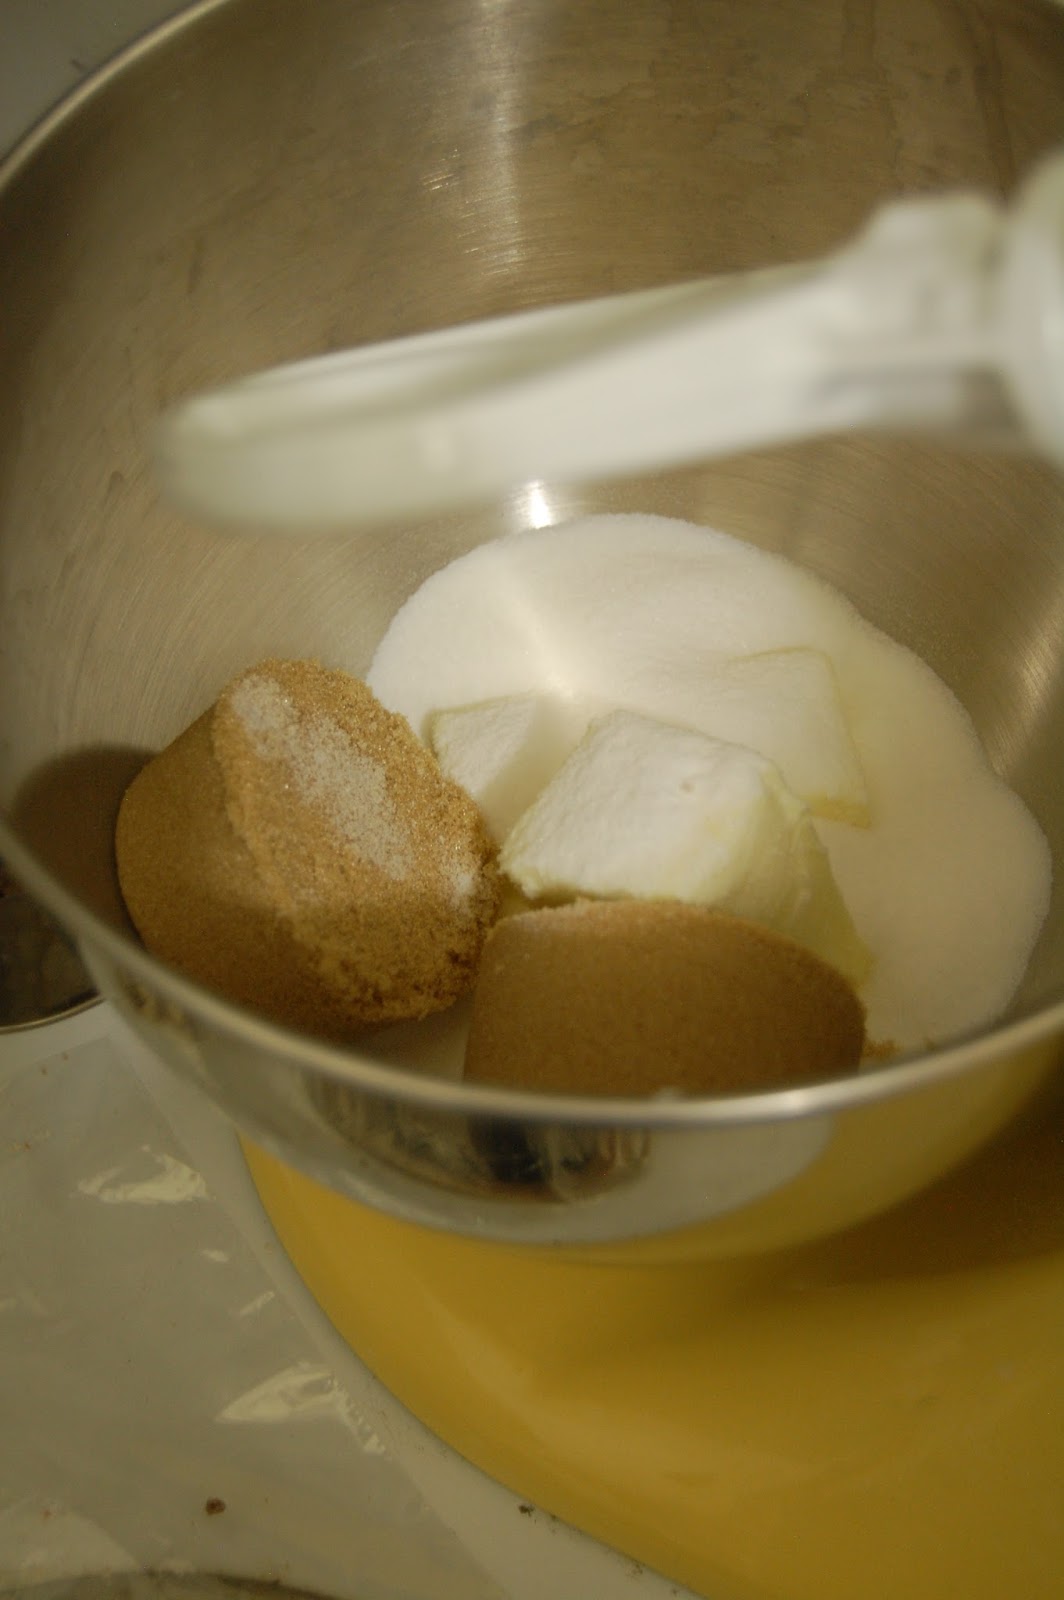
2) In a mixing bowl, beat together butter and sugar until fluffy.

Look at how pretty it was before I mixed it all together.

3) Add eggs and vanilla. Combine.

I love this stand mixer so much. You have no idea.

4) Add all of the dry ingredients, except your leftovers, and mix until combined.

I'm usually lazy and skip sifting the ingredients. Oops.
I should probably work on that.

5) Add your leftover ingredient(s) and mix again until just combined.

I'd eat that right off the beater. 

6) Make 1 inch balls of dough.

Or get distracted by your cat. Either one. 

7) Place your dough on a cookie sheet a few inches apart. (I was able to make roughly 30 cookies).

All da cookies!

8) Bake for 10 minutes, or until the cookies are golden brown.

They look so good, guys!

9) Let the cookies stand on the cookie sheet for a minute before transferring to a wire rack to cool completely.

Such a photogenic set of cookies.

And there you have it! These are super easy to make and so, so good! Although, the only leftover candy that I can't vouch for is any type of gummy. I've never tried it myself, and probably never will, but if you like that sort of thing in a cookie, more power to ya!

What type of candy or other ingredient would you put in these? Let me know in the comments below! If you have any other questions or comments, leave those below as well.

And, as always, bake on with your bad selves!

Love,
Jackie

Saturday, November 28, 2015

Extra post! Countdown to Christmas

Now that I'm living on my own, I thought I'd take the opportunity to start my own traditions! I figured I'd start with Christmas because:

A) I don't have any decorations or anything really and need to figure out what to do anyway
and
B) Christmas is just magical, period, so why not?!

One of my favorite parts of Christmas is the Advent Calendar!

Wonder what we'll find inside our calendars, Jack!
My grandparents would always send us grand-kids our very own chocolate-filled, cardboard calendars and it always made me feel like the bee's knees! (Yes, I used that phrase. Deal with it). They still send them, actually, and I still feel awful special, but I couldn't pass up the chance to make my own! (I'm apparently a smidge greedy. Oops). And by make, I mean buy one at Target and fill it with homemade goodies and cute little trinkets! So, that's why I'm here! To share some recipes with you and give you some ideas and inspiration for you own Advent Calendars!

Jack's excited. Get on his level!

Recipe #1: Coconut Macaroons

I love anything coconut and these seemed like the perfect addition to an Advent Calendar. The mounds of coconut end up looking like lovely piles of snow. Perfect for the cold, winter season.

Ingredients:
14 oz flaked, sweetened coconut
14 oz sweetened condensed milk
1/8 tsp salt
1 tsp vanilla
4 large egg whites, room temperature

Directions:
1) Preheat the oven to 325 degrees.

2) In a large bowl, mix the coconut, sweetened condensed milk, and vanilla together.

Look at this gorgeous shot! I love it too much.
Messy, but worth it!
3) Using a mixer, whip the egg whites and salt together on high until medium peaks form.

Whip it!!!
4) Carefully fold in the egg whites into the coconut mixture until just combined.

It tastes better than it looks, promise.
5) On a baking sheet lined with parchment paper, place 1 - 2 tbsp mounds of the coconut mixture a few inches apart. Bake them for 25 to 30 minutes, or until golden brown. Baking time will vary based on the size of your macaroons. Just keep an eye on them.

My first batch was pretty big!
6) Let the macaroons cool on the pan for a few minutes before transferring them to a cooling rack.

They looked so good!!!
7) And if you so desire, you can melt some chocolate to drizzle on top once they're cool! I added some mini-m&m's to mine as well! I thought it made them look extra festive.

See, instantly more festive.

Recipe #2: Paradise Bark

Another treat that reminds me of the winter landscape, this bark packs a big punch of flavor! It's inspired by tropical flavors, hence the name, and it's a refreshing twist to all of the heavier tasting barks you find this time of year!

Ingredients:
6 oz dried pineapple
2 oz macadamia nuts
7 oz flaked, sweetened coconut
24 oz vanilla almond bark

Directions:
1) Chop up the pineapple and macadamia nuts into smaller chunks.

Chop Chop Chop
Just keep chopping. Just keep chopping. Just keep chopping, chopping, chopping.
2) Mix together the pineapple, nuts, and coconut.

Honestly, I could just eat a bowl of this.
3) Melt the almond bark according to the package directions.

4) Add 3/4 of the coconut mixture to the almond bark and mix until well coated.

5) Pour the mixture onto a baking sheet lined with parchment paper, smoothing down any big lumps.

It's a snow covered field! If you squint your eyes a little bit. ;-D
6) Sprinkle the remaining coconut mixture onto the bark, pressing it in slightly to make it stick.

I'll take the whole slab, please!
7) Allow the bark to set for a few hours before breaking it into bite size pieces! (You can always stick it in the fridge to speed up the process).

Don't go breaking my bark...

Recipe #3: Peppermint Fudge

A staple around the holidays, this fudge reminds me of delicious peppermint hot chocolate. It's nice and creamy, but the bits of candy cane add a needed bit of crunch. Watch out, you may end up eating all of it before you've tucked it away into your calendar!

Ingredients:
14 oz sweetened condensed milk
2 tbsp butter
1/4 tsp salt
1 cup mini-marshmallows
12 oz semi-sweet chocolate
1/2 tsp vanilla
1/4 tsp mint extract
Candy canes, crushed into small pieces

Directions:
1) In a medium saucepan, bring the sweetened condensed milk, butter, and salt to a boil. Turn the heat down low enough to let the mixture simmer for a few minutes, stirring constantly so that the mixture doesn't burn.

2) Remove the mixture from heat and add the marshmallows first. Mix until it's smooth.

3) Add the rest of the ingredients and mix until smooth. Again.

4) In a pan of your choice (8x8, loaf pan, etc), lined with aluminum foil and coated with non-stick spray, pour in the fudge mixture. Smooth out the top and sprinkle the crushed candy cane pieces over it, being sure to push them in slightly so that they stick!

I used a loaf pan, myself.
5) Place the fudge in the fridge and allow it to set for at least 2 hours before taking it out and cutting it into bite size pieces.

HA. Like that's a serving size. I'm funny.
And there you have it! Just a few ideas to get the ball rolling on your own Advent Calendars. What's YOUR favorite treat to find in a calendar? Do you prefer to make them yourself or buy pre-made candies? Let me know in the comments below!

SANTAAAAAAA. CAN'T WAIT FOR CHRISTMAS.
And, as always, bake on with your bad selves!

Love,
Jackie

Sunday, November 22, 2015

Give 'em the old razzle dazzle

Razzle dazzle 'em!
I need more sparkle in my life.
Guys, I did it. I finally did it. I made a traditional pie completely from scratch! There was blood ... sweat ... and tears ... but I did it! (Eh, I may just be a little dramatic). Ned the Pie Maker would be so proud of me. (Let me know if you need an extra hand at the Pie Hole, will ya)?

Couldn't have said it better myself, Ned.
Are you proud of me, dear reader? I hope so! At least a little? And even if you're not, I wanted to share my experience anyway. Because that's what I do. ;-D Besides, right now is the perfect time to make a pie. Thanksgiving is this Thursday and pies are wonderful treats to share! Or eat by yourself. I'll let you make that call.

Now, instead of making an apple pie, like I had originally planned, I decided to make a Razzleberry Pie. (My title makes sense now, doesn't it? Hehe). Razzleberry pie can come with many different berry combinations - strawberry, raspberry, blueberry, blackberry, etc. And as much as I love blackberries, I wanted a smoother, hard seed free, filling. That doesn't mean the pie was any less delicious, though! And if you think my berry combination is weird, you can always come up with your own. Baking comes down to personal taste. You've got the power, after all!

So much powah!!!
Side thought: Does anyone else sing "razzleberry dressing" in a little kid's voice whenever they hear or read razzleberry?

He knows what's up.
No? ... Okay, forget I mentioned anything.

On with the show!

Pie Crust Ingredients:
2 cups flour
10 tbsp salted butter, cold - cut into small chunks
1 large egg yolk
1/3 cup ice water

Razzleberry Pie Filling Ingredients:
2 cups frozen strawberries
1 cup frozen blueberries
1 cup frozen raspberries
3 tbsp cornstarch
1 cup sugar
1/2 tsp salt
2 tbsp water

Pie Crust Directions:
I have a confession to make. I had to make the pie crust twice. The first time I made it, it just didn't work out at all. Everything ended up in the trash. Many profanities were muttered. It was great. So, don't feel bad if you have trouble either! Pie crusts are hard to make, guys.

1) Put the flour in a large bowl and cut in the cold butter until you form coarse crumbs. It could take a few minutes.

Look at how nice it looks.
I didn't get a picture of the process. Hard to take pictures with dirty hands!
2) In a separate container, whisk together the egg yolk and water.

3) Make a hole in the center of the flour mixture and pour in the egg mixture.

4) Gradually stir the flour and egg mixtures together. Keep combining until a rough dough is formed. If the dough seems too dry, add 1 tbsp of ice water at a time until it's just saturated enough.

5) Divide the dough in half and form each half into a ball. Wrap each ball in plastic wrap. (Or if you're a doofus like me and ran out of plastic wrap, you can put each ball into a plastic bag. Doh).

All the dough!
6) Refrigerate for at least 2 hours. Or even overnight, like I did!

Razzleberry Pie Directions:
1) Preheat your oven to 375 degrees.

2) Put all of the filling ingredients into a medium saucepan and simmer on the stove over medium heat until the filling is thickened. Remove the saucepan from the heat and allow to cool to room temperature.

It snowed in my saucepan!
Getting there. Slowly, but surely!
That's what I'm talking about!
3) On a lightly floured surface, roll out one ball of dough to fit your pie tin. Place it in the tin and let it cool in the fridge for 30 minutes.

I used a fondant roller because I don't have a rolling pin... Huh.
4) Once the filling is cool, pour it on top of your chilled pie crust.

Gorgeous, darling!
5) Roll out the other ball of dough to fit over the top of your pie.

6) Place it on top of your pie and crimp the edges together. I didn't really know what I was doing, so mine ended up looking very rustic! Make it as fancy or as simple as you want.

I love the way my pie looked!
7) Prick holes in the top of the pie dough to allow steam to escape during the baking process.

8) If you so desire, you can make an egg wash out of 1 egg and 1 tbsp of water to brush over the pie crust. It gives it a beautiful color when it's all done!

9) Put the pie in the oven and bake until the crust is golden and the mixture is slightly bubbling. With my oven, it only took 40 minutes. It could take a little bit longer for you!
      - If your crust is getting too brown, cover the pie with aluminum foil to finish the baking process!

10) Take your pie out of the oven and let it cool before serving! If you cut into right away, it'll ooze all over the place!

YUUUUUMMMMMM.
And there you have it! A delicious pie to feast upon this coming Turkey Day. Or any day that you feel like making it, really. All days are good pie days. It was very hard to wait to share this with my family. I wanted to dig into it as soon as it was out of the oven!

Dean Winchester is my spirit animal.
What's your favorite pie to make for the holidays? Or even better, your favorite pie just to eat?! Comment with your favorites down below! Please leave any other comments or questions down below, as well!

And, as always, bake on with your bad selves!

Happy Thanksgiving!

Love,
Jackie