Hello, dear reader!
Thank you so much for taking a peek at my blogger website!
Two things:
1) I'll no longer be posting recipes here.
via GIPHY
2) But that's because I now have my very own domain name!
via GIPHY
CLICK HERE! To check out the new digs and to see any future recipe posts!
Lemme know what you think. Make sure you comment over on the new website!
And, as always, bake on with your bad selves!
Love,
Jackie
Monday, May 23, 2016
Wednesday, February 10, 2016
It's February already?!
Valentine's Day has never been a huge holiday for me. True, I always try to give my family and friends cards and sweets to help spread the love, but it's not a super important day. (It's no Christmas or Halloween, that's for sure)! Part of this might be due to the lack of Valentine's over the years. And part of it might be due to my lack of substantial love for the color pink. Or both! Who knows?! But, no matter! I decided to make a post for Valentine's Day this year anyway.
To celebrate loving life and all that it has to offer.
To celebrate who you are and who you have yet to become.
To celebrate just having fun!
So, whether you have a Valentine (hey, Arlen, heyyyyy), a house full of pets, your family and friends, or just yourself, celebrate the love this Valentine's Day and treat yourself to a delicious mug cake!
That's right, you don't even have to get a pot or pan dirty for this recipe. Just an ol' over-sized mug! (Which, to be honest, is the best kind of mug out there. Or I'm just addicted to drinking copious amounts of tea. Hmm).
Onto the food love!
Mug Cake Ingredients:
4 tbsp flour
3 tbsp sugar
2 tbsp cocoa powder
1 egg, whisked
3 tbsp milk
3 tbsp oil
A splash of vanilla
Jelly/jam/preserves of your choice
Sprinkles (because why not?!)
Directions:
1) Add the flour, sugar, cocoa, and sprinkles (if you wish) to your over-sized mug and mix together.
2) Add the egg, milk, oil, and vanilla and combine. Be sure to scrape the bottoms of the mug to make sure all of the dry ingredients are incorporated.
3) Add a dollop (I used about a tablespoon) of your choice of jelly/jam/preserves to your mix. I think it adds a nice tang to the finished product.
4) Place your mug in a microwave and heat on high for 2 to 3 minutes. It just depends on how powerful your microwave is. I accidentally cooked mine for a little too long, so keep an eye on it.
5) Let it rest for a bit before diving in! It'll be a little too warm for your taste buds straight out of the microwave.
And there ya go! A quick and simple recipe to make for yourself! I like this recipe because it doesn't have an overpowering chocolate flavor. It has just the right amount to please a chocolate lover's palette.
What's your favorite Valentine's Day treat? Let me know in the comments below! If you have any other questions or comments, leave those down below too.
And, as always, bake on with your bad selves!
Happy Valentine's Day!!
Love,
Jackie
To celebrate loving life and all that it has to offer.
 |
| Enjoy life like Liz Lemon. [Source: www.pinterest.com] |
 |
| Embrace your quirks! [Source: www.nkayesel.com] |
To celebrate just having fun!
 |
| Release your inner Andy! [Source: www.landmarkfestival.org] |
So, whether you have a Valentine (hey, Arlen, heyyyyy), a house full of pets, your family and friends, or just yourself, celebrate the love this Valentine's Day and treat yourself to a delicious mug cake!
That's right, you don't even have to get a pot or pan dirty for this recipe. Just an ol' over-sized mug! (Which, to be honest, is the best kind of mug out there. Or I'm just addicted to drinking copious amounts of tea. Hmm).
Onto the food love!
Mug Cake Ingredients:
4 tbsp flour
3 tbsp sugar
2 tbsp cocoa powder
1 egg, whisked
3 tbsp milk
3 tbsp oil
A splash of vanilla
Jelly/jam/preserves of your choice
Sprinkles (because why not?!)
Directions:
1) Add the flour, sugar, cocoa, and sprinkles (if you wish) to your over-sized mug and mix together.
 |
| The delicious version of dirt. |
2) Add the egg, milk, oil, and vanilla and combine. Be sure to scrape the bottoms of the mug to make sure all of the dry ingredients are incorporated.
 |
| Secret time! I forgot to take a picture when I added the other wet ingredients. |
3) Add a dollop (I used about a tablespoon) of your choice of jelly/jam/preserves to your mix. I think it adds a nice tang to the finished product.
 |
| It really doesn't look very appetizing, but I promise it's yummy. |
4) Place your mug in a microwave and heat on high for 2 to 3 minutes. It just depends on how powerful your microwave is. I accidentally cooked mine for a little too long, so keep an eye on it.
 |
| Nothing fancy here. |
5) Let it rest for a bit before diving in! It'll be a little too warm for your taste buds straight out of the microwave.
 |
| This would be even better with ice cream or whipped cream on top. Mmmmmmmmmm! |
And there ya go! A quick and simple recipe to make for yourself! I like this recipe because it doesn't have an overpowering chocolate flavor. It has just the right amount to please a chocolate lover's palette.
What's your favorite Valentine's Day treat? Let me know in the comments below! If you have any other questions or comments, leave those down below too.
And, as always, bake on with your bad selves!
Happy Valentine's Day!!
 |
| Cheers! [Source: www.justaboutwrite.com] |
Jackie
Saturday, January 30, 2016
Happy Birthday, AmazingPhil!
It's been far too long since I made cupcakes.
FAR. TOO. LONG.
So, here I am! Making cupcakes inspired by one of my favorite YouTubers, the one and only AmazingPhil.
He was one of the first YouTubers, if not THE first, that I actively watched. (Well, him and Danisnotonfire).
I spent a good amount of time *cough month or two cough* catching up on all of Phil's past videos. While I was at my old job.
Oops.
(I had nothing else to do, I swear)!
Anyway, he's still one of my all time favorite YouTubers! He's quirky, slightly awkward, super down to earth, and British! Great, right? Well, his birthday is today, and I know this is cutting it close, but I wanted to make some Lion Cupcakes in his honor anyway. Because that's how I roll. Or bake, as the case may be.
These cupcakes are adorable, oh so tasty little treats. I'm really quite happy with how they turned out. I've never been much of a frosting/cake/etc. decorator, so these are a work of art compared to my other experiments. I decided to go with an orange cupcake to get away from the usual, super rich flavors. Granted, the frosting is pretty sweet, but it's all about balance after all. I think the flavors mesh well together (they're like a creamsicle!) so give 'em a go to find out for yourself!
And, no, you don't have to wait another year to make these for Phil. Make them anytime you'd like. I don't think he'd mind. ;-D
Cupcake Ingredients
1/2 cup butter, softened
3/4 cup sugar
2 eggs
Zest of 2 oranges
1 1/2 cups flour
1 1/2 tsp baking powder
1/4 tsp baking soda
1/4 tsp salt
1/2 cup fresh orange juice
Directions
1) Preheat your oven to 350 degrees.
2) Cream together the butter and sugar.
3) Beat in the eggs, one at a time.
4) Add orange zest and combine.
5) In a separate bowl, sift together the flour, baking powder, baking soda, and salt.
6) Add the dry ingredients alternately with the orange juice to the butter mixture.
** The cupcakes already have a slight orange tint to them with the addition of the orange zest and juice, but if you'd like them to be more vibrant, add some orange food coloring to the batter. **
7) Divide the batter into a lined cupcake pan. I ended up having enough batter for 15 cupcakes.
8) Bake the cupcakes for 18 to 22 minutes, or until the tops are golden. My oven baked them in 14 minutes.
9) Allow the cupcakes to cool in the pan for a minute or two before transferring them to a wire rack to cool completely.
Frosting Ingredients
3/4 cup butter
1 pound powdered sugar
1 tbsp vanilla
Milk
Orange food coloring
Frosting Directions
Mix together the butter, powdered sugar, and vanilla. Add a small amount of milk at a time to get your desired frosting consistency. Don't forget to add orange food coloring to keep with the lion theme!
Once all of your cupcakes are cooled, add a layer of orange frosting to the top of them. I just used the tried and true "spreading with a knife" method.
Lion Decorations
- Airheads, cut up into triangular pieces (I was a goof and ended up getting Strawberry instead of Cherry, so the mane is more pink than red. Oops).
- Chocolate Chips
- Licorice strips (Mine were of the sour variety. The sugar granules give the lion a little more texture).
- Black gel frosting
Assembly is pretty straight forward. And you can always tailor the decoration choices to your tastes. Remember to let your imaginations run wild!
...Badum tsh.
If someone made you birthday cupcakes, what would you want them to look like? Or what flavor would you want them to be? Let me know below! And if you have any questions or comments, please leave them below as well!
Thanks for reading and, as always, bake on with your bad selves!
Love,
Jackie
FAR. TOO. LONG.
So, here I am! Making cupcakes inspired by one of my favorite YouTubers, the one and only AmazingPhil.
 |
| Me too, Phil, me too. [Source: chipotlou.tumblr.com] |
 |
| Oh, stop. It was the least I could do. [Source: explodedovariesexplodedovaries.tumblr.com] |
Oops.
(I had nothing else to do, I swear)!
 |
| I'll just hide under a blanket too. Don't tell on me! [Source: amazingphil-gifs.tumblr.com] |
 |
| He's all about the lions. [Source: chipotlou.tumblr.com] |
And, no, you don't have to wait another year to make these for Phil. Make them anytime you'd like. I don't think he'd mind. ;-D
 |
| Oh, I might be mistaken! [Source: pinterest.com] |
1/2 cup butter, softened
3/4 cup sugar
2 eggs
Zest of 2 oranges
1 1/2 cups flour
1 1/2 tsp baking powder
1/4 tsp baking soda
1/4 tsp salt
1/2 cup fresh orange juice
Directions
1) Preheat your oven to 350 degrees.
2) Cream together the butter and sugar.
 |
| There's only so many times I can show you guys a picture of butter and sugar. |
 |
| Raw egg or alien embryo? [The truth is out there. Cue X-Files theme]. |
 |
| Zesting powers, ACTIVATE! |
6) Add the dry ingredients alternately with the orange juice to the butter mixture.
 |
| Look at how delicious that looks! Fresh squeezed juice is the way to go. |
 |
| Action shot. BOOM. |
7) Divide the batter into a lined cupcake pan. I ended up having enough batter for 15 cupcakes.
 |
| They smelled so good. I wish we had smell-o-vision for you. |
9) Allow the cupcakes to cool in the pan for a minute or two before transferring them to a wire rack to cool completely.
Frosting Ingredients
3/4 cup butter
1 pound powdered sugar
1 tbsp vanilla
Milk
Orange food coloring
Frosting Directions
Mix together the butter, powdered sugar, and vanilla. Add a small amount of milk at a time to get your desired frosting consistency. Don't forget to add orange food coloring to keep with the lion theme!
 |
| Orange you glad I didn't say banana? |
 |
| It's that homemade look. |
- Airheads, cut up into triangular pieces (I was a goof and ended up getting Strawberry instead of Cherry, so the mane is more pink than red. Oops).
- Chocolate Chips
- Licorice strips (Mine were of the sour variety. The sugar granules give the lion a little more texture).
- Black gel frosting
Assembly is pretty straight forward. And you can always tailor the decoration choices to your tastes. Remember to let your imaginations run wild!
...Badum tsh.
 |
| Almost too cute to eat! ... ALMOST ... |
Thanks for reading and, as always, bake on with your bad selves!
Love,
Jackie
Sunday, January 17, 2016
Leftover Cookies
I have a confession to make - I had no idea what I really wanted to bake for this blog post. I knew that I wanted to bake cookies, but that was about as far as my inspiration took me. Did I wanna make big cookies? Small cookies? Stuffed cookies? Super complex, decorated cookies? I didn't know! All I had in my head was ...
Cookies.
I mean, let's face it, cookies are pretty much amazing. They're one of my favorite sweets to bake ... eat ... share ... You name the reason and I'll usually say yes to cookies.
Now, when I finally set off on my baking adventure, I went in with the intention of making Malteser cookies. The finished product wasn't what I had expected (I'll attempt those again one day), but it was too delicious not to share with you. I've ended up calling these "Leftover Cookies" because the basic recipe would be great with any leftover candy that you have lying around. Even my Maltesers were leftovers from a date I went on recently!
(I requested them with the full intention of eating them [they're one of my favorite candies], but I ended up being too nervous to actually consume any. Thanks to that special guy for getting them for me and for not minding that I didn't eat them right away. You're the best).
And while these cookies are far from healthy (all that butter and sugar), they'd be great with some healthy, leftover ingredients too! Nuts, dried fruit, seeds, oats, you name it. Whatever sounds good to you probably sounds good to me! Let your pantry lead the way. (And be sure to keep this recipe on hand near Valentine's Day ... Easter ... Halloween. Think of all that cheap, leftover candy you can buy at the supermarket)!
Ingredients
1 cup butter, softened
1 cup white sugar
1 cup light brown sugar, packed
2 large eggs
2 tsp vanilla
3 cups flour
1 tsp baking power
1 tsp baking soda
3/4 tsp salt
Leftover candy/ingredient of your choice!
Directions
1) Preheat oven to 350 degrees.
2) In a mixing bowl, beat together butter and sugar until fluffy.
3) Add eggs and vanilla. Combine.
4) Add all of the dry ingredients, except your leftovers, and mix until combined.
5) Add your leftover ingredient(s) and mix again until just combined.
6) Make 1 inch balls of dough.
7) Place your dough on a cookie sheet a few inches apart. (I was able to make roughly 30 cookies).
8) Bake for 10 minutes, or until the cookies are golden brown.
9) Let the cookies stand on the cookie sheet for a minute before transferring to a wire rack to cool completely.
And there you have it! These are super easy to make and so, so good! Although, the only leftover candy that I can't vouch for is any type of gummy. I've never tried it myself, and probably never will, but if you like that sort of thing in a cookie, more power to ya!
What type of candy or other ingredient would you put in these? Let me know in the comments below! If you have any other questions or comments, leave those below as well.
And, as always, bake on with your bad selves!
Love,
Jackie
Cookies.
 |
| Spongebob gets me. [Source: spoonuniversity.com] |
I mean, let's face it, cookies are pretty much amazing. They're one of my favorite sweets to bake ... eat ... share ... You name the reason and I'll usually say yes to cookies.
 |
| OMNOMNOM [Source: giphy.com] |
Now, when I finally set off on my baking adventure, I went in with the intention of making Malteser cookies. The finished product wasn't what I had expected (I'll attempt those again one day), but it was too delicious not to share with you. I've ended up calling these "Leftover Cookies" because the basic recipe would be great with any leftover candy that you have lying around. Even my Maltesers were leftovers from a date I went on recently!
(I requested them with the full intention of eating them [they're one of my favorite candies], but I ended up being too nervous to actually consume any. Thanks to that special guy for getting them for me and for not minding that I didn't eat them right away. You're the best).
 |
| A wink from me through Scott Pilgrim. [Source: giphy.com] |
And while these cookies are far from healthy (all that butter and sugar), they'd be great with some healthy, leftover ingredients too! Nuts, dried fruit, seeds, oats, you name it. Whatever sounds good to you probably sounds good to me! Let your pantry lead the way. (And be sure to keep this recipe on hand near Valentine's Day ... Easter ... Halloween. Think of all that cheap, leftover candy you can buy at the supermarket)!
Ingredients
1 cup butter, softened
1 cup white sugar
1 cup light brown sugar, packed
2 large eggs
2 tsp vanilla
3 cups flour
1 tsp baking power
1 tsp baking soda
3/4 tsp salt
Leftover candy/ingredient of your choice!
Directions
1) Preheat oven to 350 degrees.
2) In a mixing bowl, beat together butter and sugar until fluffy.
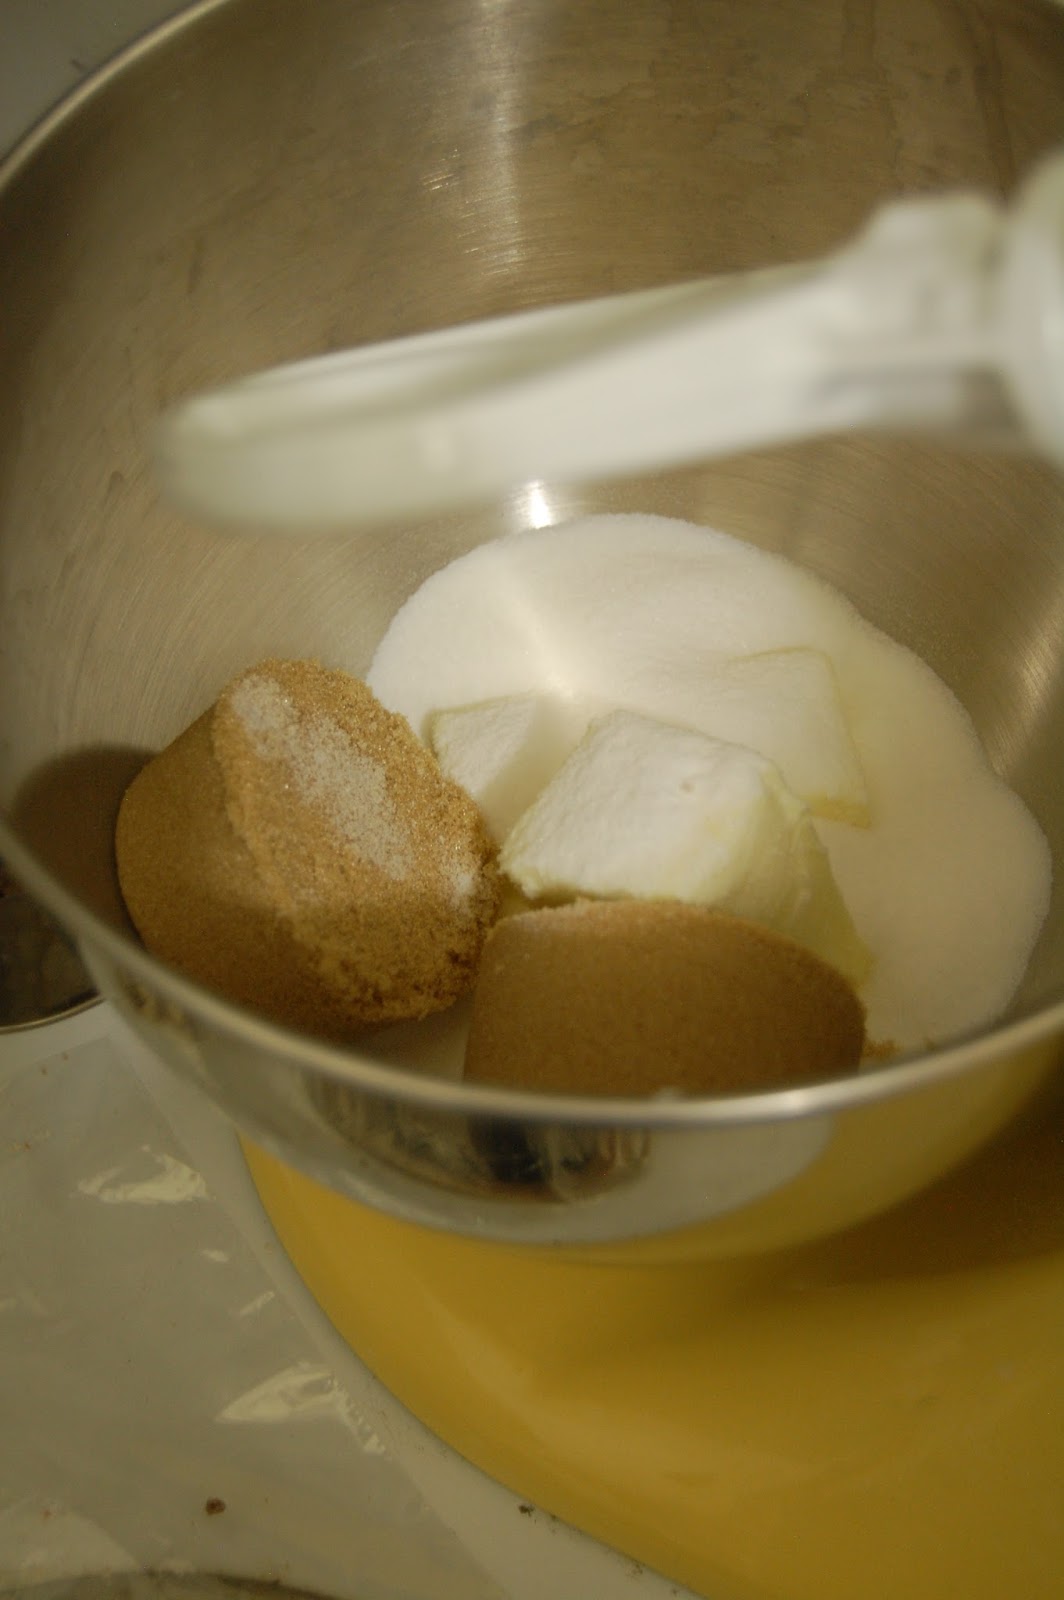 |
| Look at how pretty it was before I mixed it all together. |
3) Add eggs and vanilla. Combine.
 |
| I love this stand mixer so much. You have no idea. |
4) Add all of the dry ingredients, except your leftovers, and mix until combined.
 |
| I'm usually lazy and skip sifting the ingredients. Oops. I should probably work on that. |
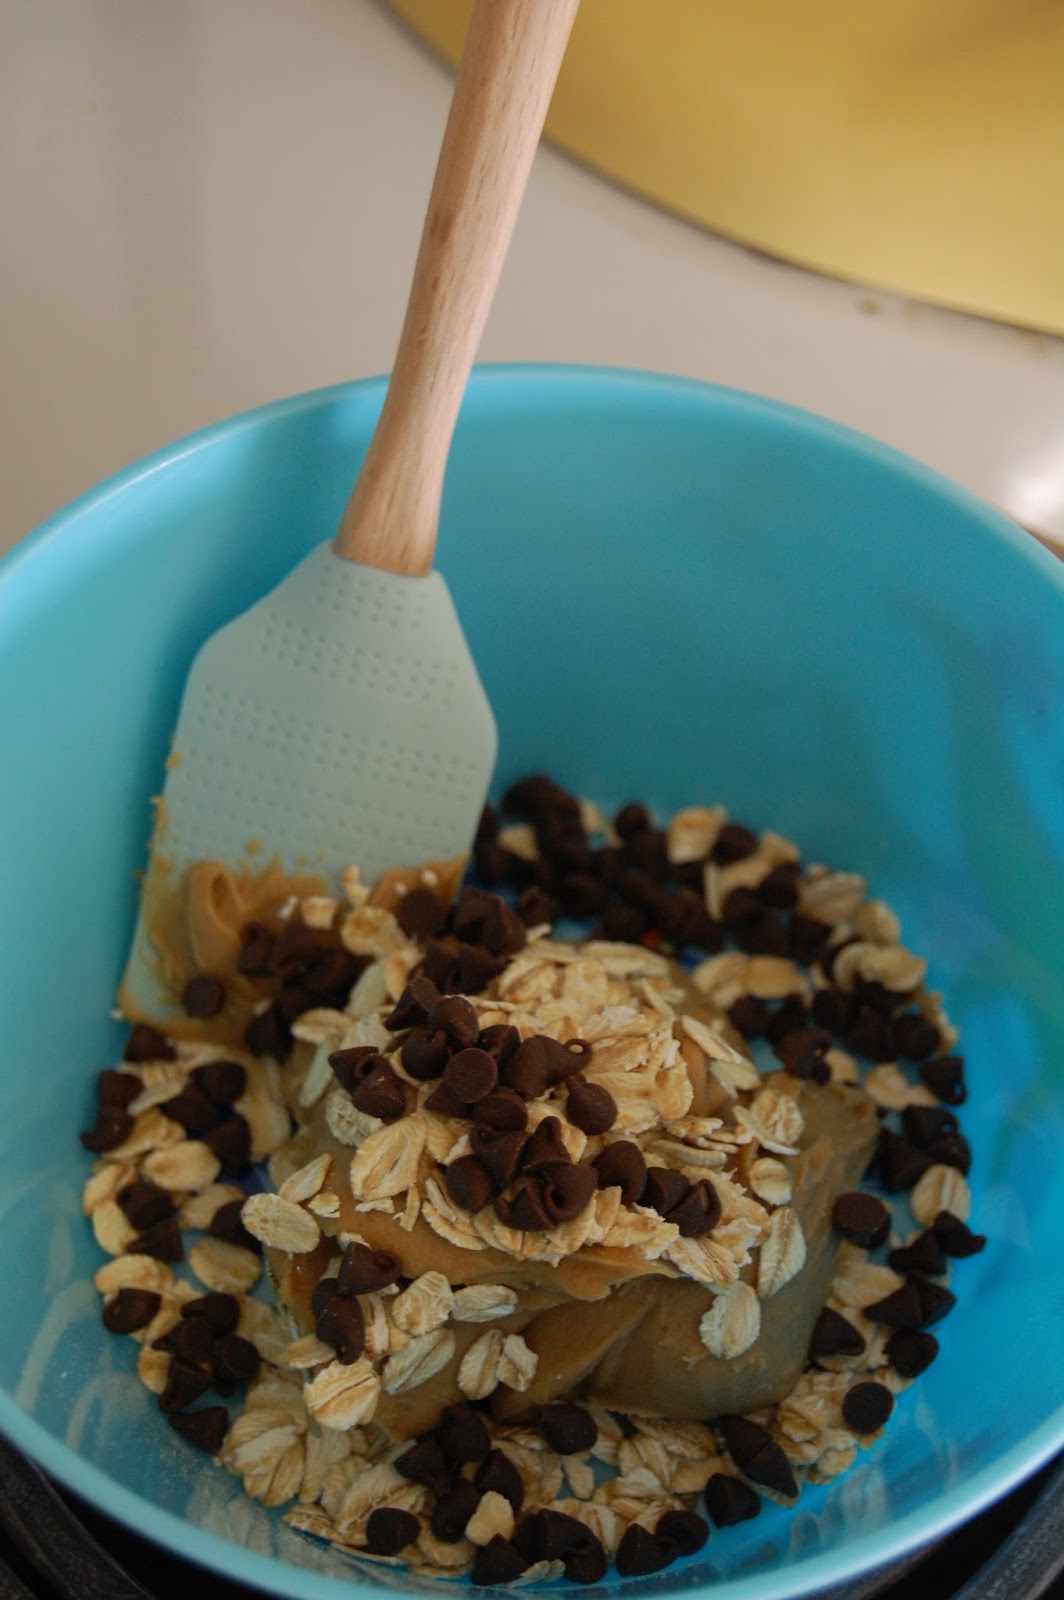
5) Add your leftover ingredient(s) and mix again until just combined.
 |
| I'd eat that right off the beater. |
6) Make 1 inch balls of dough.
 |
| Or get distracted by your cat. Either one. |
7) Place your dough on a cookie sheet a few inches apart. (I was able to make roughly 30 cookies).
 |
| All da cookies! |
8) Bake for 10 minutes, or until the cookies are golden brown.
 |
| They look so good, guys! |
9) Let the cookies stand on the cookie sheet for a minute before transferring to a wire rack to cool completely.
 |
| Such a photogenic set of cookies. |
And there you have it! These are super easy to make and so, so good! Although, the only leftover candy that I can't vouch for is any type of gummy. I've never tried it myself, and probably never will, but if you like that sort of thing in a cookie, more power to ya!
What type of candy or other ingredient would you put in these? Let me know in the comments below! If you have any other questions or comments, leave those below as well.
And, as always, bake on with your bad selves!
Love,
Jackie
Saturday, January 2, 2016
Insert Clever Name for Baked Apples Here
HAPPY NEW YEAR, dear readers!
It's already 2016. Way to make me feel old, world, way to make me feel OLD.
Anywho, it's that time of the year again when a large majority of the population makes resolutions to better their lives and better themselves. Some people are great at keep their resolutions and these are people I both admire and envy. But, if you're anything like me, you have good intentions - you'll set your goals, you'll make attempts to keep your resolution for as long as you - but they never end up working out right.
So, instead of listing resolutions that I know I'll never keep, I decided to bake something in the spirit of the new year.
 |
| ALL THE CONFETTI! [Source: giphy.com] |
 |
| And growing a beard, apparently. [Source: giftranscription.tumblr.com] |
 |
| Gold stars all around! |
My lovely friend, Amanda L., helped me decide on some good, ol' fashioned baked apples. They're delicious. They're filling. They're pretty easy to make. They're even sort of healthy, as long as you don't go too crazy with the fillings! And, hey, this is probably the healthiest recipe I've posted here thus far, so that counts for something, right? Right!
(I ended up only making 2 baked apples since I live and alone and can't get through food that quickly, but doubling/tripling/etc the recipe is easy. Feel free to make as many as you like)!
(I ended up only making 2 baked apples since I live and alone and can't get through food that quickly, but doubling/tripling/etc the recipe is easy. Feel free to make as many as you like)!
Here we go!
 |
| Just like Mario! (I've been watching Game Grumps go through Mario 64. Thanks, guys). [Source: telltalegames.com] |
Ingredients
2 apples (I used gala - partly because they're good baking apples and partly because I already had some in my kitchen. I'm all about using leftover ingredients).
3 tbsp peanut butter
1.5 tbsp oats
1.5 tbsp oats
1.5 tbsp mini chocolate chips (Or whichever size you want. I had these lying around my kitchen too).
Honey (You can either mix this in with your other ingredients or drizzle it on top of your apples. I'll leave that up to you).
Directions
1) Preheat oven to 375 degrees.
2) Core out each apple and scrape out a 1 inch wide opening with a metal spoon. Keep scraping out your apples until you have roughly 1 inch of apple left at the bottom.
3) Mix together your filling ingredients.
4) Divide the mixture between your apples.
5) Place the apples in a baking pan. (I'm still acquiring different size pans, so I used my 9x13 cake pan. Instead of getting the whole pan dirty, though, I made a smaller baking vessel in the middle of it out of aluminum foil).
6) Pour enough water on the bottom of your pan to cover the bottom of your apples.
7) Bake your apples for 40 to 50 minutes. It depends on how soft you want your apples to be. OR if you have a possessed oven that bakes things oddly, you'll probably only have to bake them for 30 minutes. Thanks, apartment oven.
And there you have it! You can dive right into one of those bad boys as soon as it comes out of the oven if you want. And if you're feeling a little less healthy, you can always top the apples with whipped cream or a scoop of ice cream. Anyway you eat 'em, they're delicious.
We won't judge.
So, cheers to everyone who makes resolutions and cheers to everyone who doesn't! Let's have a kick-ass 2016!
If you have any questions, comments, or random GIFs you'd like to share, leave them down in the comment section below! Be sure to share this post if you enjoyed it. Thanks for reading! :-)
And, as always, bake on with your bad selves!
Love,
Jackie
2) Core out each apple and scrape out a 1 inch wide opening with a metal spoon. Keep scraping out your apples until you have roughly 1 inch of apple left at the bottom.
 |
| I had tiny apples, I swear the opening isn't really that big! |
 |
| I'd just eat this to be quite honest. |
5) Place the apples in a baking pan. (I'm still acquiring different size pans, so I used my 9x13 cake pan. Instead of getting the whole pan dirty, though, I made a smaller baking vessel in the middle of it out of aluminum foil).
 |
| They look so lonely. |
7) Bake your apples for 40 to 50 minutes. It depends on how soft you want your apples to be. OR if you have a possessed oven that bakes things oddly, you'll probably only have to bake them for 30 minutes. Thanks, apartment oven.
 |
| They end up looking like stuffed grapes. They're tastier than they look. |
We won't judge.
 |
| No judgment here! [Source: giphy.com] |
If you have any questions, comments, or random GIFs you'd like to share, leave them down in the comment section below! Be sure to share this post if you enjoyed it. Thanks for reading! :-)
And, as always, bake on with your bad selves!
Love,
Jackie
Saturday, November 28, 2015
Extra post! Countdown to Christmas
Now that I'm living on my own, I thought I'd take the opportunity to start my own traditions! I figured I'd start with Christmas because:
A) I don't have any decorations or anything really and need to figure out what to do anyway
and
B) Christmas is just magical, period, so why not?!
One of my favorite parts of Christmas is the Advent Calendar!
My grandparents would always send us grand-kids our very own chocolate-filled, cardboard calendars and it always made me feel like the bee's knees! (Yes, I used that phrase. Deal with it). They still send them, actually, and I still feel awful special, but I couldn't pass up the chance to make my own! (I'm apparently a smidge greedy. Oops). And by make, I mean buy one at Target and fill it with homemade goodies and cute little trinkets! So, that's why I'm here! To share some recipes with you and give you some ideas and inspiration for you own Advent Calendars!
Recipe #1: Coconut Macaroons
I love anything coconut and these seemed like the perfect addition to an Advent Calendar. The mounds of coconut end up looking like lovely piles of snow. Perfect for the cold, winter season.
Ingredients:
14 oz flaked, sweetened coconut
14 oz sweetened condensed milk
1/8 tsp salt
1 tsp vanilla
4 large egg whites, room temperature
Directions:
1) Preheat the oven to 325 degrees.
2) In a large bowl, mix the coconut, sweetened condensed milk, and vanilla together.
3) Using a mixer, whip the egg whites and salt together on high until medium peaks form.
4) Carefully fold in the egg whites into the coconut mixture until just combined.
5) On a baking sheet lined with parchment paper, place 1 - 2 tbsp mounds of the coconut mixture a few inches apart. Bake them for 25 to 30 minutes, or until golden brown. Baking time will vary based on the size of your macaroons. Just keep an eye on them.
6) Let the macaroons cool on the pan for a few minutes before transferring them to a cooling rack.
7) And if you so desire, you can melt some chocolate to drizzle on top once they're cool! I added some mini-m&m's to mine as well! I thought it made them look extra festive.
Recipe #2: Paradise Bark
Another treat that reminds me of the winter landscape, this bark packs a big punch of flavor! It's inspired by tropical flavors, hence the name, and it's a refreshing twist to all of the heavier tasting barks you find this time of year!
Ingredients:
6 oz dried pineapple
2 oz macadamia nuts
7 oz flaked, sweetened coconut
24 oz vanilla almond bark
Directions:
1) Chop up the pineapple and macadamia nuts into smaller chunks.
2) Mix together the pineapple, nuts, and coconut.
3) Melt the almond bark according to the package directions.
4) Add 3/4 of the coconut mixture to the almond bark and mix until well coated.
5) Pour the mixture onto a baking sheet lined with parchment paper, smoothing down any big lumps.
6) Sprinkle the remaining coconut mixture onto the bark, pressing it in slightly to make it stick.
7) Allow the bark to set for a few hours before breaking it into bite size pieces! (You can always stick it in the fridge to speed up the process).
Recipe #3: Peppermint Fudge
A staple around the holidays, this fudge reminds me of delicious peppermint hot chocolate. It's nice and creamy, but the bits of candy cane add a needed bit of crunch. Watch out, you may end up eating all of it before you've tucked it away into your calendar!
Ingredients:
14 oz sweetened condensed milk
2 tbsp butter
1/4 tsp salt
1 cup mini-marshmallows
12 oz semi-sweet chocolate
1/2 tsp vanilla
1/4 tsp mint extract
Candy canes, crushed into small pieces
Directions:
1) In a medium saucepan, bring the sweetened condensed milk, butter, and salt to a boil. Turn the heat down low enough to let the mixture simmer for a few minutes, stirring constantly so that the mixture doesn't burn.
2) Remove the mixture from heat and add the marshmallows first. Mix until it's smooth.
3) Add the rest of the ingredients and mix until smooth. Again.
4) In a pan of your choice (8x8, loaf pan, etc), lined with aluminum foil and coated with non-stick spray, pour in the fudge mixture. Smooth out the top and sprinkle the crushed candy cane pieces over it, being sure to push them in slightly so that they stick!
5) Place the fudge in the fridge and allow it to set for at least 2 hours before taking it out and cutting it into bite size pieces.
And there you have it! Just a few ideas to get the ball rolling on your own Advent Calendars. What's YOUR favorite treat to find in a calendar? Do you prefer to make them yourself or buy pre-made candies? Let me know in the comments below!
And, as always, bake on with your bad selves!
Love,
Jackie
A) I don't have any decorations or anything really and need to figure out what to do anyway
and
B) Christmas is just magical, period, so why not?!
One of my favorite parts of Christmas is the Advent Calendar!
 |
| Wonder what we'll find inside our calendars, Jack! |
 |
| Jack's excited. Get on his level! |
Recipe #1: Coconut Macaroons
I love anything coconut and these seemed like the perfect addition to an Advent Calendar. The mounds of coconut end up looking like lovely piles of snow. Perfect for the cold, winter season.
Ingredients:
14 oz flaked, sweetened coconut
14 oz sweetened condensed milk
1/8 tsp salt
1 tsp vanilla
4 large egg whites, room temperature
Directions:
1) Preheat the oven to 325 degrees.
2) In a large bowl, mix the coconut, sweetened condensed milk, and vanilla together.
 |
| Look at this gorgeous shot! I love it too much. |
 |
| Messy, but worth it! |
 |
| Whip it!!! |
 |
| It tastes better than it looks, promise. |
 |
| My first batch was pretty big! |
 |
| They looked so good!!! |
 |
| See, instantly more festive. |
Recipe #2: Paradise Bark
Another treat that reminds me of the winter landscape, this bark packs a big punch of flavor! It's inspired by tropical flavors, hence the name, and it's a refreshing twist to all of the heavier tasting barks you find this time of year!
Ingredients:
6 oz dried pineapple
2 oz macadamia nuts
7 oz flaked, sweetened coconut
24 oz vanilla almond bark
Directions:
1) Chop up the pineapple and macadamia nuts into smaller chunks.
 |
| Chop Chop Chop |
 |
| Just keep chopping. Just keep chopping. Just keep chopping, chopping, chopping. |
 |
| Honestly, I could just eat a bowl of this. |
4) Add 3/4 of the coconut mixture to the almond bark and mix until well coated.
5) Pour the mixture onto a baking sheet lined with parchment paper, smoothing down any big lumps.
 |
| It's a snow covered field! If you squint your eyes a little bit. ;-D |
 |
| I'll take the whole slab, please! |
 |
| Don't go breaking my bark... |
Recipe #3: Peppermint Fudge
A staple around the holidays, this fudge reminds me of delicious peppermint hot chocolate. It's nice and creamy, but the bits of candy cane add a needed bit of crunch. Watch out, you may end up eating all of it before you've tucked it away into your calendar!
Ingredients:
14 oz sweetened condensed milk
2 tbsp butter
1/4 tsp salt
1 cup mini-marshmallows
12 oz semi-sweet chocolate
1/2 tsp vanilla
1/4 tsp mint extract
Candy canes, crushed into small pieces
Directions:
1) In a medium saucepan, bring the sweetened condensed milk, butter, and salt to a boil. Turn the heat down low enough to let the mixture simmer for a few minutes, stirring constantly so that the mixture doesn't burn.
2) Remove the mixture from heat and add the marshmallows first. Mix until it's smooth.
3) Add the rest of the ingredients and mix until smooth. Again.
4) In a pan of your choice (8x8, loaf pan, etc), lined with aluminum foil and coated with non-stick spray, pour in the fudge mixture. Smooth out the top and sprinkle the crushed candy cane pieces over it, being sure to push them in slightly so that they stick!
 |
| I used a loaf pan, myself. |
 |
| HA. Like that's a serving size. I'm funny. |
 |
| SANTAAAAAAA. CAN'T WAIT FOR CHRISTMAS. |
Love,
Jackie
Subscribe to:
Posts (Atom)